Skip to content

Simple Dry Brined Roast Beef Recipe

If you master this very simple brining method, every roast you make will be more flavourful, juicy, and tender than ever before. The way you make roasts will honestly change forever.

Dry brined roast beef, medium on a cutting board

Dry brining has become my go-to method for any type of roast from poultry to red meat. 

It’s dead simple, less messy and less wasteful that wet brining, and the flavour is unmatched. 

This method also gives the beef a mini dry-age while it brines adding even more flavour.  Served with a piping hot Au jus for a perfect low carb main. 

SHARE THIS NOW.

Yum

SERIOUSLY, DO IT.

This is an ad.

The first time I dry brined anything was purely out of necessity. I was trying to cook a whole turkey in our tiny apartment with a small fridge, there was simply no room in my fridge for a massive tub of salty water with a 18lb turkey in it to sit for 2-3 days. 

Also, who has a tub that big in an apartment?

Dry brined Roast beef with piping hot au jus poured over

Benefits of a dry brine

  • The flavours penetrate the meat better and every bite is perfectly seasoned 
  • Takes up less space and is less of a mess than a wet brine, while being equally if not more effective
  • Couldn’t be more simple, you are just rubbing meat with lots of salt and letting it sit 
  • The inside stays juicy and the outside gets a nice crust after cooking
  • When dry brining beef like this roast, the 24h exposed in the fridge is like a mini dry age (although much shorter) which is great for concentrating the flavour of the beef and forming a nice crust
  • The salty drippings make a lip smacking au jus or gravy!
  • This recipe is low carb, keto, and semi-carnivore friendly!

What is a dry brine?

Dry brining involves covering the entire outside of a roast liberally with salt and other seasonings, and then letting it sit uncovered in the fridge, sometimes for many days until its time to cook.

It can be used to beef, pork, and lamb roasts, as well as whole chicken, turkeys, and other poultry. 

What does dry brining do?

Something magic. 

Dry brining allows the salt and seasonings to penetrate deep into the meat so that every single bite is juicy, and flavourful. Even the very center cuts of meat that usually remain under seasoned are packed with flavour.  

The outside of the roast stays dry while brining which leads to a beautiful crust once cooked that is just full of flavour.

How does dry brining work?

I won’t pretend to know all the science behind it, but here is my understanding of how dry brining works. 

The salt draws moisture out of the meat which then mixes with all the salty goodness you coated the meat in which creates the brine. 

This brine then soaks back into the meat imparting it with all the flavours of the brine. Some of this moisture will fall to the catch pan below, this will be discarded later. 

No fancy injections or techniques involved, just cover it in salt and let it sit.

Raw roast beef after a 24h dry brine
This roast is perfectly brined after 24h in the fridge

Doesn’t that make the meat super salty?

Amazingly, no! It doesn’t. The liquid that drains off into the catch pan would be very salty, but you don’t use that. 

The meat itself is honestly perfectly seasoned, and not overly salty in any way. 

You gotta try it!

What you need to know

Below is a deep dive into the key details of this recipe, for a full set of directions and ingredients on how to make a dry brined roast beef jump ahead to the recipe card now!

What type of salt is used in a dry brine?

The best types of salt for dry brining are coarse grind salt and flaked salt. Flaked Kosher salt is my go to for all cooking as I find it tastes the best. 

However, regular old sea salt or table salt will work fine. 

You do not need curing salt (aka pink curing salt/Prague powder) for a dry brine. 

How much salt does dry brining take?

There are some general rules of thumb about how much salt per pound you need. 

Around 1 tablespoon per pound of meat will give you pretty good coverage for most roasts.  

However, there is always a lot that falls to the pan or cutting board when applying the brine so it’s better to have extra, adding an additional tablespoon of salt at the end helps compensate for spillage. 

Any extra I use for something else, It’s just salt and spices, as long as it doesnt come in contact with the raw meat it will last a long time.

This is an ad.

What seasonings can I add to the salt?

Whatever dry seasonings you like! For this roast recipe add dried rosemary, black pepper, garlic powder, and celery salt. 

How Long Does a Dry Brine take?

The amount of time you dry brine something will depend on the type of meat, and the size. 

Generally for a beef roast, 24 hours is sufficient, although depending how large the roast is you can go, 48 hours.

For really large roast or poultry like a full turkey you’ll want to dry brine for a minimum 48 hours, but preferably 72 hours. I wouldn’t recommend going longer than 72 hours. 

I’ll cover this in a dedicated dry brined turkey post later this year. 

Do you cover the meat while dry brining?

No.

Leave it uncovered in the fridge. There are 2 main reasons for this. 

First, you don’t want to trap moisture between the meat and the cover, it can turn rancid and ruin the brine, you want the extra liquid to drain to a catch pan below. 

Second, leaving the meat exposed helps dry the outside of the roast which will lead to a better crust in the oven. 

For roasts like beef this is like a super mini dry age.

For roasts like chicken and turkey this will create crispy skin on the outside. 

You’ll also want to elevate the roast off the catch pan a little bit with a baking rack or something similar so it is not sitting in the liquid on the pan.

This is an ad.

Do you wash the brine off before cooking?

Absolutely not!

There will be a considerable amount of liquid that drains out of the meat into the catch pan below, that is the only part you need to discard. 

Leave the dry brine on the meat and cook it that way!

Do you add more salt to a dry brined roast?

You don’t need to add any additional salt to the roast after dry brining. The brining will perfectly season the roast.

Careful with adding any additional seasonings or rubs, especially store bought ones that contain salt as it can make the roast too salty.

This is an ad.

How to Dry Brine Roast Beef

Start by making the dry rub mixture 

  • Prepare a full batch of the dry rub so you have extra. Any leftovers can be saved as long as they don’t come in direct contact with the raw meat. 
  • Combine the salt (About 1 generous tablespoon of salt per pound of meat + 1 extra tablespoon for spillage) with any dry herbs or spices you like such as dried rosemary, parsley, black pepper, and celery salt to create the rub.  
  • Liberally coat the outside of the roast with the dry rub. When it doubt, add more, some will fall off just get a nice coating on there. 
  • Place a baking rack on a tray to help keep the roast elevated off the tray and place the roast on the tray uncovered. The tray will catch any liquid that drains off during the brining process.
  • Refrigerate the brined roast uncovered for 24-48 hours until ready to cook. 
  • Remove the roast from the fridge 1 hour before cooking to warm to room temperature and discard any liquid in the tray.
  • Do NOT wash the dry rub off the roast.
This is an ad.

Prepare for Roasting

The final step before roasting is to insert slivers of garlic into the roast and coat the top with butter. This infuses the roast with a beautiful garlic flavour and the butter keeps the roast moist while creating a succulent crust on top. 

  • Take a sharp paring knife, and stab it into the top of the roast, piercing it about 1 inch [2.5 cm] deep, wiggle the knife side to side to make a little pocket in the beef. Repeat this many times over the top of the roast trying to space the pockets evenly. 
  • Peel cloves of fresh garlic, remove the tail, slice large into slivers/slices and press them into the pockets all over the roast. Press down hard to get it as far in as you can. 
Full roast, dry brined, with slivers of garlic inserted into the top before roasting

To form a flavourful crust

  • Combine softened butter with any dry herbs such as rosemary, sage, or parsley, and mash together with a fork or blitz in a food processor to form a compound butter. 
  • Slather a thick layer of compound butter on the top side of the roast.
  • Place the beef in a heavy bottom roasting pan or a cast iron skillet for roasting. A heavy sturdy pan will help the roast cook evenly.
Full roast in a cast iron skillet, top covered in compound butter ready for roasting.

Roast Beef Cooking Times and temperatures

Roast beef is cooked in 3 stages. 

  1. Searing
  2. Roasting
  3. Resting

1. Searing

Cooking method: Scorching hot oven

Temperature: 425 to 450°F [220 to 230°C]

Searing time: 20 – 25 minutes

You know it’s done when: the outside is starting to brown or the internal temperature has started to rise. 

A deeper dive

To sear the roast you’ll need to get the oven really nice and hot. A quick sear will get the crust started on the outside and begin the process of bringing the center of the meat up to safe temperature. 

  1. Pre-heat the oven 450°F [230°C].
  2. Once hot, add the roast in the pan to the oven uncovered. 
  3. Cook for 20 – 25 minutes until the outside starts to brown. Don’t over do it. 
  4. Optionally you can check the temperature in the center before and after to see if it’s starting to warm. 
  5. After searing, drop the oven temperature down to roasting temp for the remaining cook time. 

2. Roasting

Temperature: 325°F [160°C]

Cooking time: 40 to 60 minutes (15 to 20 minutes per pound)

You know its done when: The center temperature is 8 to 10° below your target finished temperature

  1. After the searing, drop the oven temperature to 325°F [160°C] and roast uncovered for 15-20 minutes per pound, depending on desired doneness. 
  2. Use a meat thermometer to check the center temperature 15 minute before you expect it to be done, better safe than sorry!
  3. Once the center of the roast is 8 to 10° below your target finished temperature, pull it from the oven to rest (it finishes cooking while resting.)
  4. Optional: Turn the broiler on for the final 1-2 minutes of cook time for a perfect crust.

Degree of doneness and internal temperatures

Use a meat thermometer to read the internal temperature of the roast and cook to the desired doneness using the guide below. 

The internal temperature will continue to rise while resting.

Rare: 125°F to 130°F [52°C to 54°C], remove from the oven between 115° and 120°F [46°C to 49°C] 

Medium-rare: 135°F to 140°F [57°C to 60°C] , remove from the oven between 125°F and 130°F [52°C to 54°C]

Medium:  145°F to 150°F [63°C to 66°C], remove from the oven between 135°F and 140°F [57°C to 60°C]

Medium-well: 155°F to 160°F [68°C to 71°C], remove from the oven between 145°F and 150°F [63°C to 66°C]

Perfect medium pink roast sliced on black cutting board

3. Resting

Resting is crucial when cooking any meat. 

This is especially true for red meat like beef. 

Hastily cutting into an unrested roast will result in the juices running all over the cutting board and out the roast, making it dry. 

Resting also allows the roast finish cooking. The internal temperature of the roast should rise 5-10° during the resting period. 

How to rest a roast

  1. Remove the cooked roast from the oven.
  2. Transfer the roast to a cutting board or clean serving plate. 
  3. Loosely tent the roast with some foil, do not wrap it too tight. Let the roast sit for at least 10-15 minutes before cutting into it. 

How to Make a Hot Au-Jus

This recipe calls for a piping hot au jus to drizzle over the succulent meat. It really adds to the enjoyment of the meal and brings the plate together, especially if the roast beef has cooled a bit after carving, the hot au jus is just perfect!

To make an simple Au Jus

Start with the drippings left in the pan the beef was roasted in. 

1. Place the roasting pan on a burner over low heat. If the pan is dry with very little fat leftover, add a couple pats of butter.

2. Deglaze the pan by adding some broth/stock (beef, chicken, duck, etc.) or water to the hot pan. Bring the pan to a rapid simmer. 

3. Gently scrape the drippings off the pan with a wooden spoon. 

4. Add in the vinegar, mustard, red wine and combine well. Continue simmering until the liquid has reduce and the flavours are where you want them. 

This is an ad.

Easy Dry Brined Roast Beef

Dry brined roast beef, medium on a cutting board
Prep Time 30 minutes
Cook Time 1 hour 30 minutes
Brining Time 1 day
Servings 8 servings
Calories 490 kcal
Net Carbs 0.4 g
Rate this Recipe
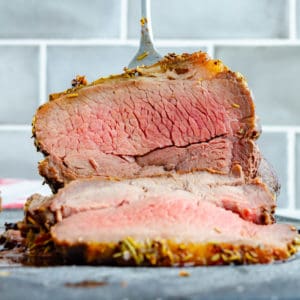
A 24h dry brine is best way to add massive flavour while keeping your roast beef juicy and tender. Infused with cloves of garlic, and slathered with compund butter, this method is an absolute game changer.

IMPORTANT – There are often Frequently Asked Questions within the blog post that you may find helpful. Simply scroll back up to read them!

ad.

Equipment

  • baking tray
  • baking rack
  • cast Iron skillet or heavy roasting pan
  • Knife and Cutting Board

Ingredients
  

  • 3-4 pound beef roast see notes
  • 4 cloves garlic slivered
  • cup butter softened
  • 1 tablespoon rosemary

Dry Brine

  • 4-5 tablespoons coarse salt 1 tablespoon per pound of meat + 1 tbsp for spillage, see notes for fine salt.
  • 1 tablespoon rosemary
  • 1 ½ teaspoons black pepper
  • 1 teaspoon celery salt

Au Jus

  • pan drippings
  • ½ cup broth/water
  • ¼ cup red wine
  • 1 tablespoon Dijon mustard
  • 1 tablespoon vinegar

Instructions
 

24 hours before cooking

  • Prepare Dry brine Mix. Add the salt, rosemary, parsley, black pepper, and celery salt to a small bowl and combine well.
    4-5 tablespoons coarse salt, 1 ½ teaspoons black pepper, 1 teaspoon celery salt, 1 tablespoon rosemary
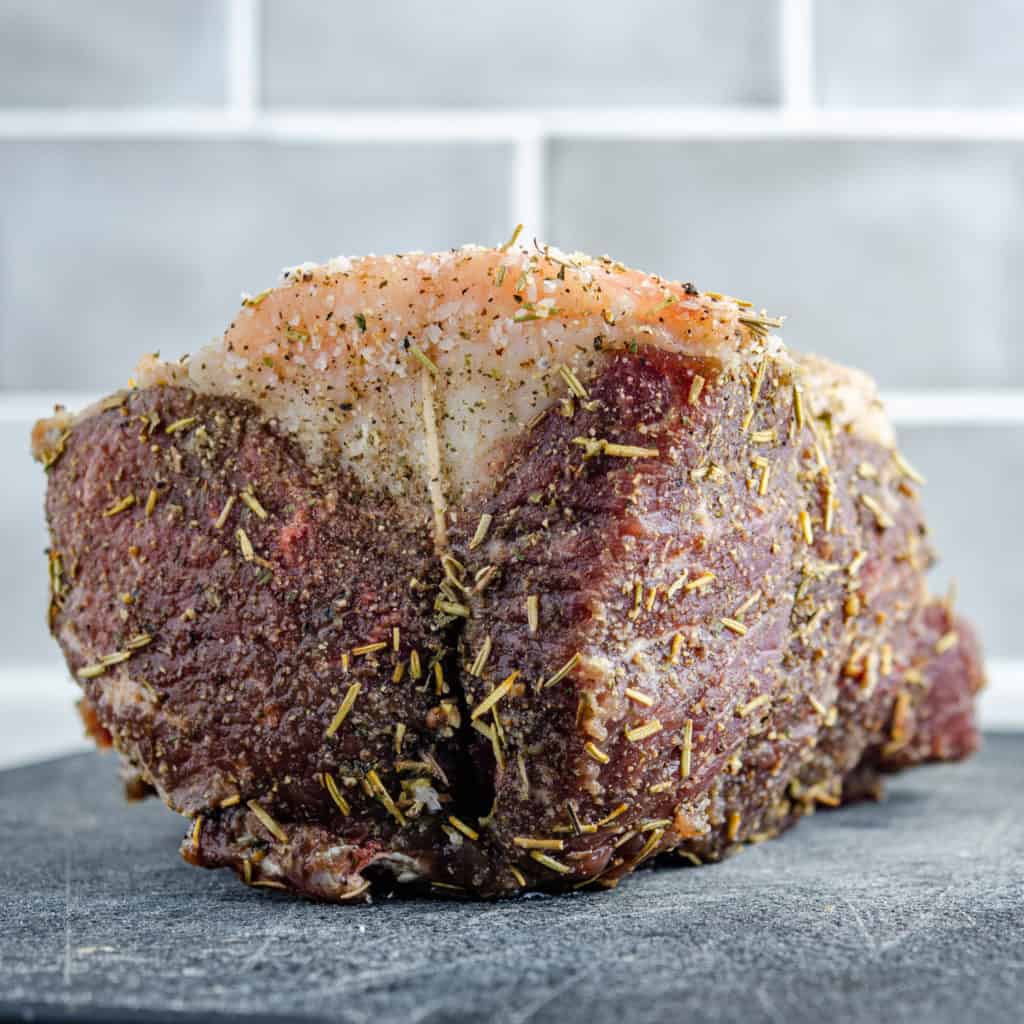
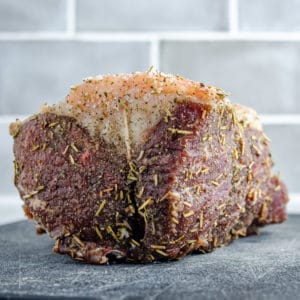
  • Coat the Roast Liberally. Use the salt mixture to coat the entire roast liberally. Use your hands to massage the seasoning into every nook and cranny you can find. You do not need to use the full brine mixture on the roast, you will have extra brine mixture leftover and a lot will fall to the pan while you are coating. Extra brine mixture can be save as long as it doesn't come in contact with the meat. The goal is to evenly coast the roast in a liberal layer of salt, about 1 tbsp per pound.
    3-4 pound beef roast
    Raw roast beef after a 24h dry brine
  • Refrigerate uncovered overnight. Place the brined roast on a rack to allow air flow around all sides, and be sure to put a tray underneath to collect any liquids. Refrigerate uncovered for 24 to 48 hours depending on the size of the roast.
    Full roast, dry brined, with slivers of garlic inserted into the top before roasting

45 minutes before cooking

  • Let the roast warm to room temperature. Remove the roast from the fridge and allow it to warm to near room temperature before cooking.
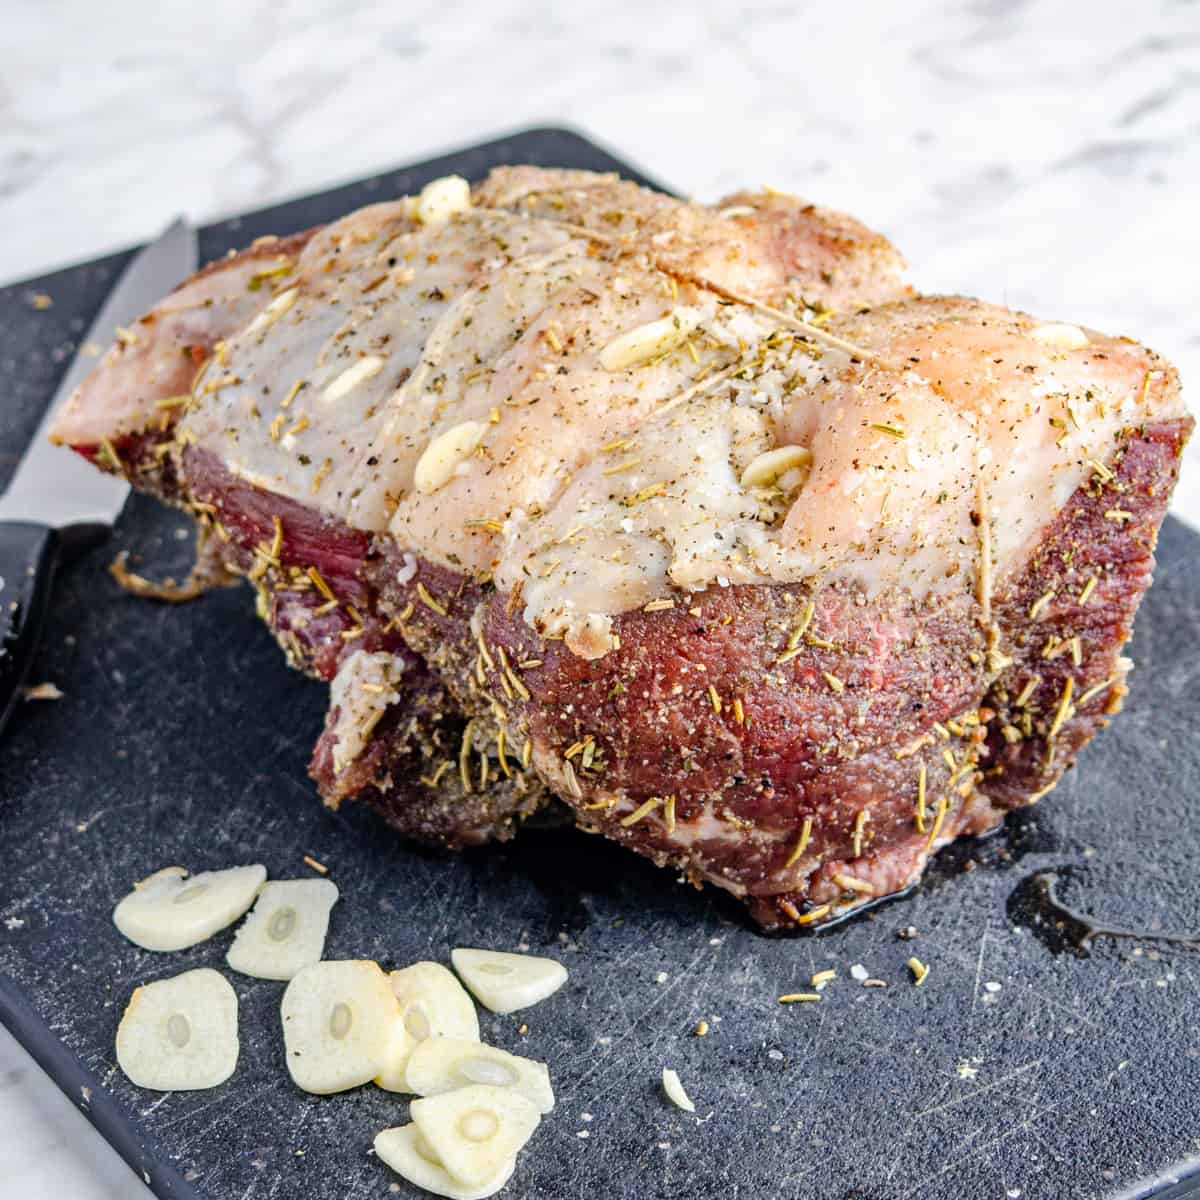
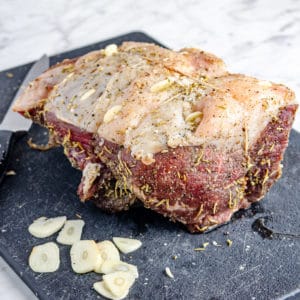
  • Insert garlic slices into the roast. Use a paring knife to pierce to top of the roast about 1" deep to create a pocket. Stuff the slices of garlic into the pocket. Repeat this all over the top of the roast.
    4 cloves garlic
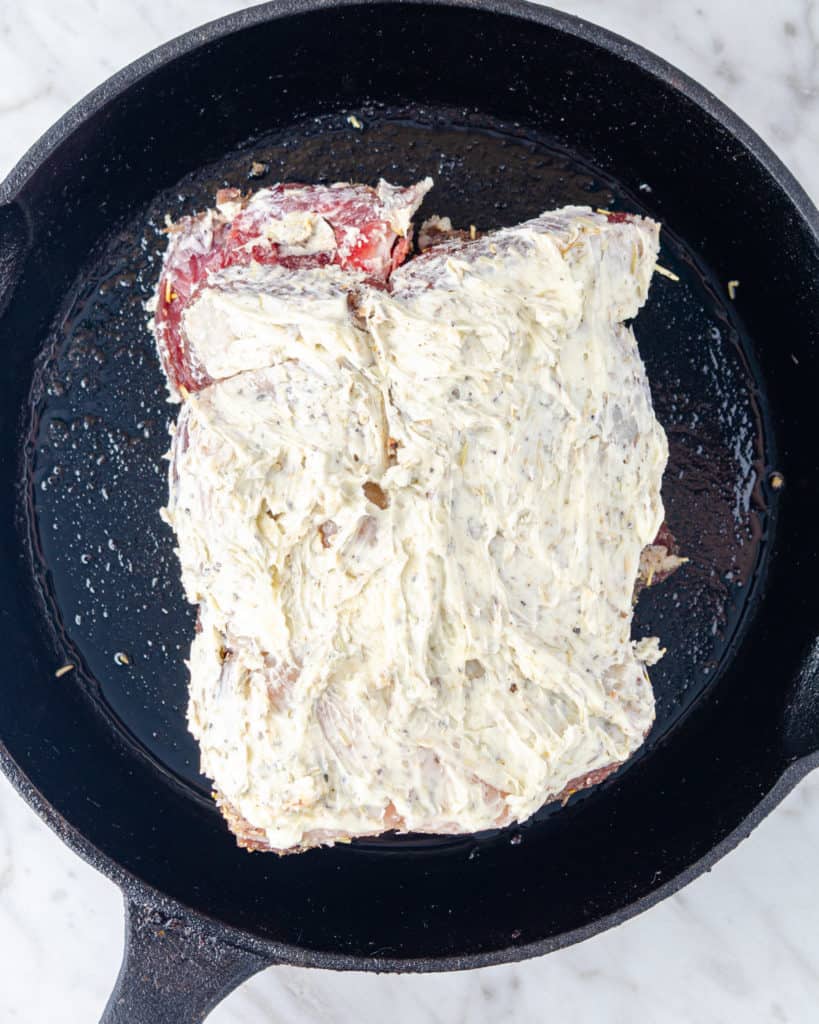
  • Cover the top with compound butter. Add softened butter and rosemary to a bowl and mash together with a fork until well combined. You can also use a food processor. Slather this compound butter over the top of the roast creating a thick layer.
    ⅓ cup butter, 1 tablespoon rosemary

When its time to cook

  • Pre-heat the oven to 425°F [220°C].
  • Sear in a hot oven for 20 minutes. Place the roast in a cast iron skillet or thick roasting pan. Cook in a 425°F [220°C] oven for 20 minutes to start the sear then turn the oven down to 350°F [176°C] for the remainder of the cook time.
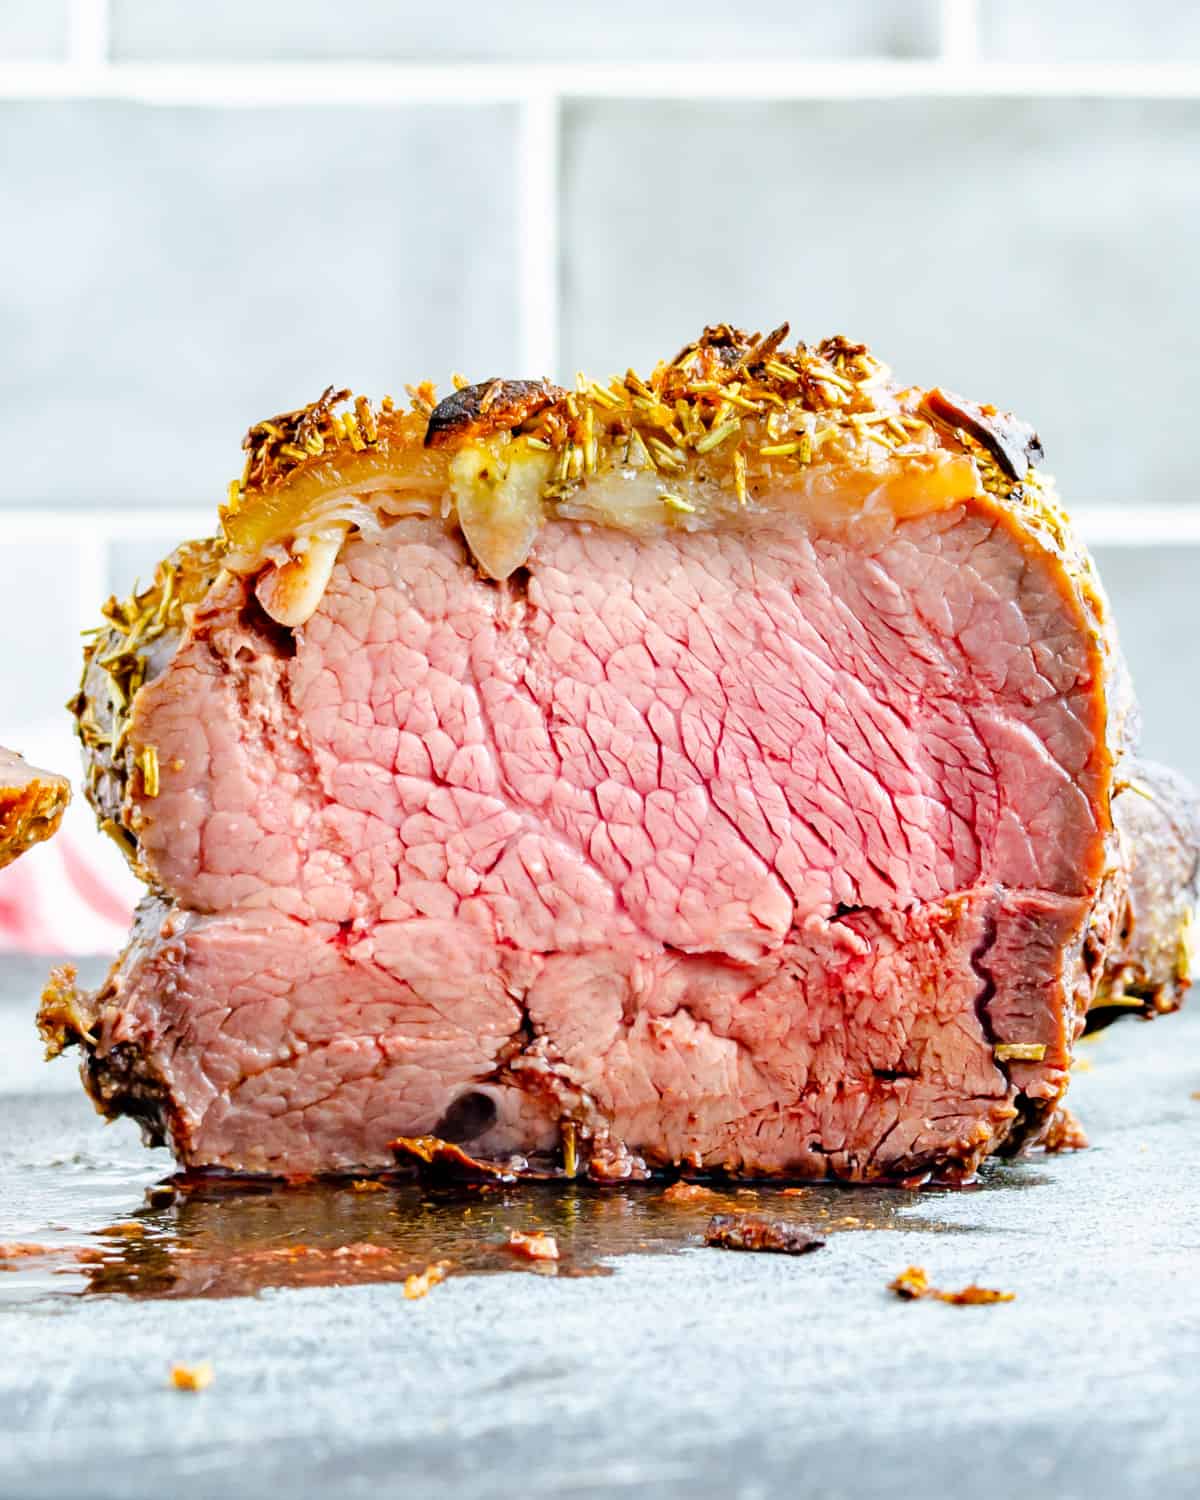
  • Cook to desired doneness. Roast at 15-23 minutes per pound until the center temperature is 8 to 10 degrees below your chosen finish temperature. (see notes) For medium rare this is 120°F [48°C] Check the temperature well before your estimated time (3/4 of the way through), sometimes things move quicker than expected!
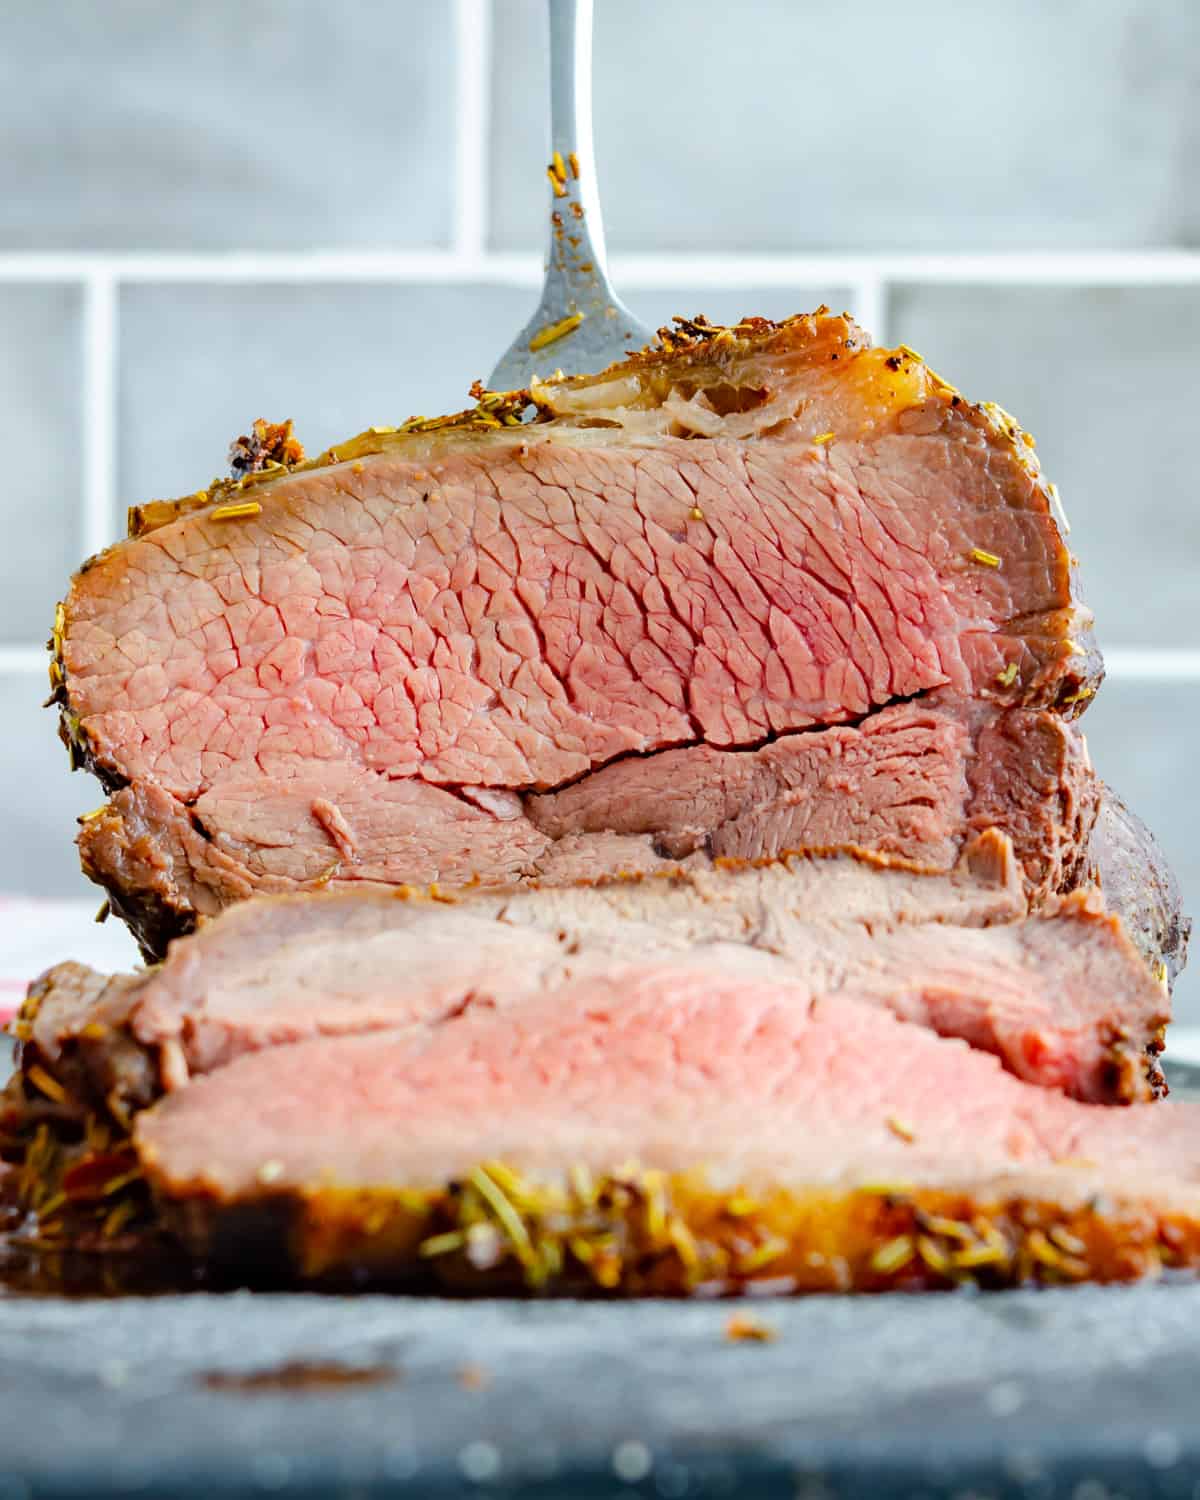
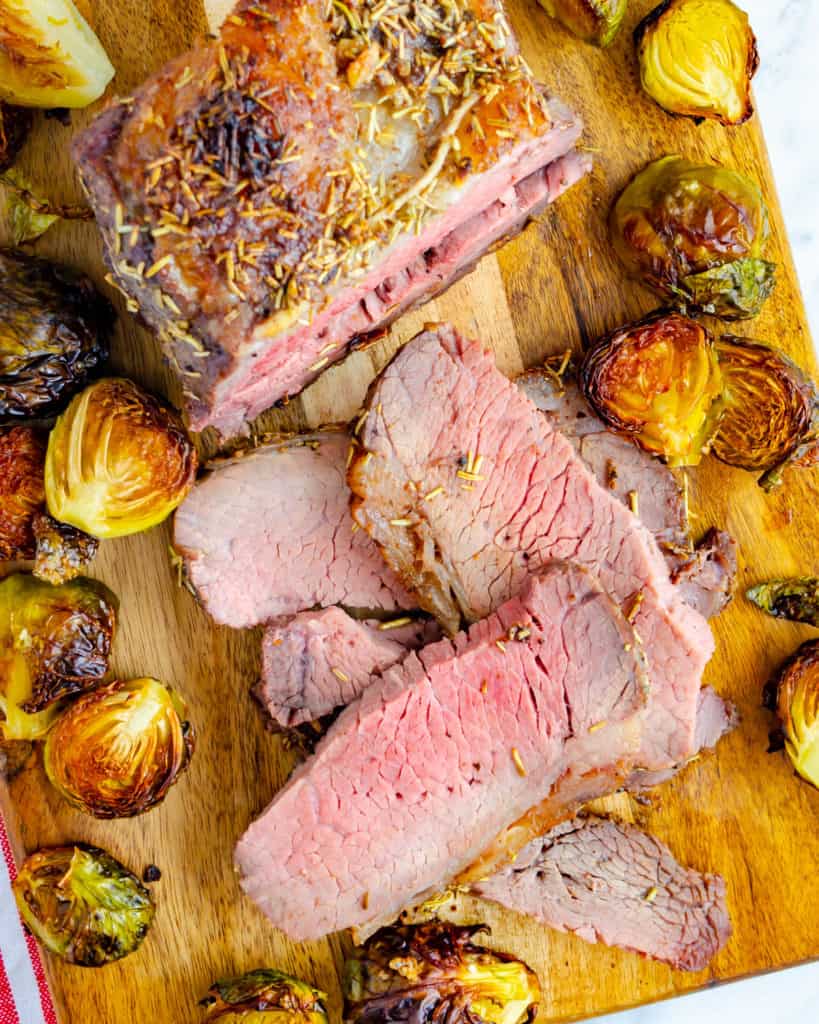
  • Rest before serving. Once the roast has reached temperature remove it from the oven and allow it to rest on a cutting board and tent loosely with foil for at least 10 to 15 minutes before carving.
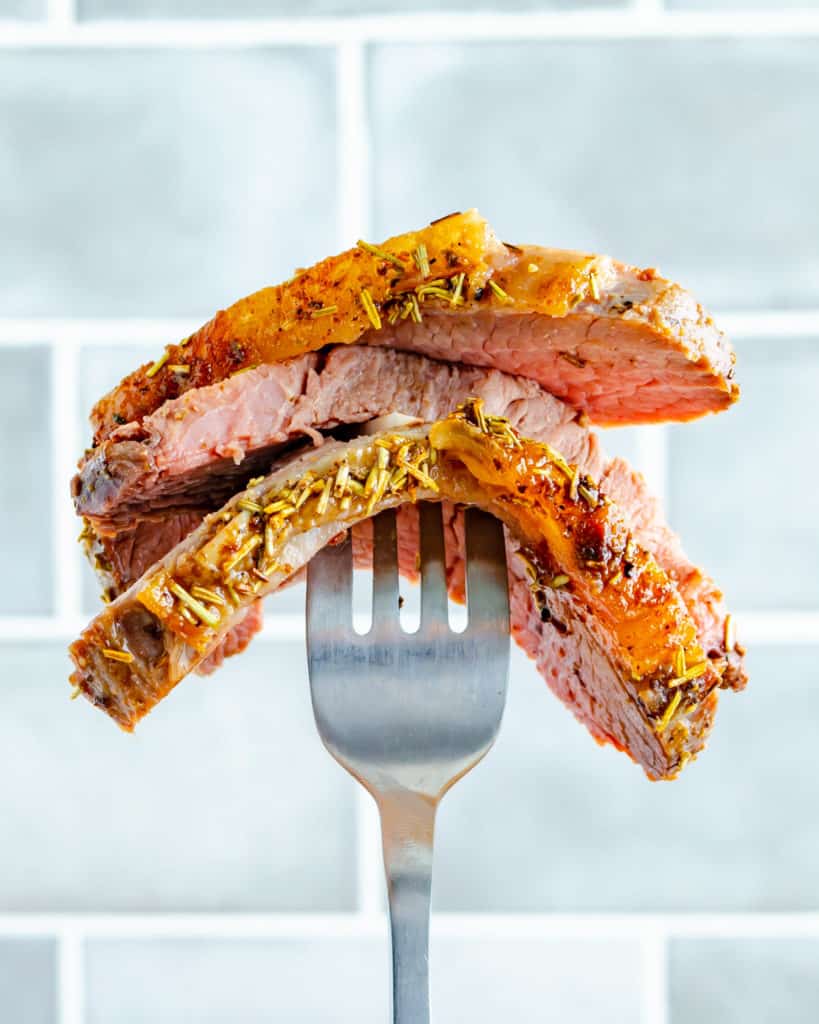
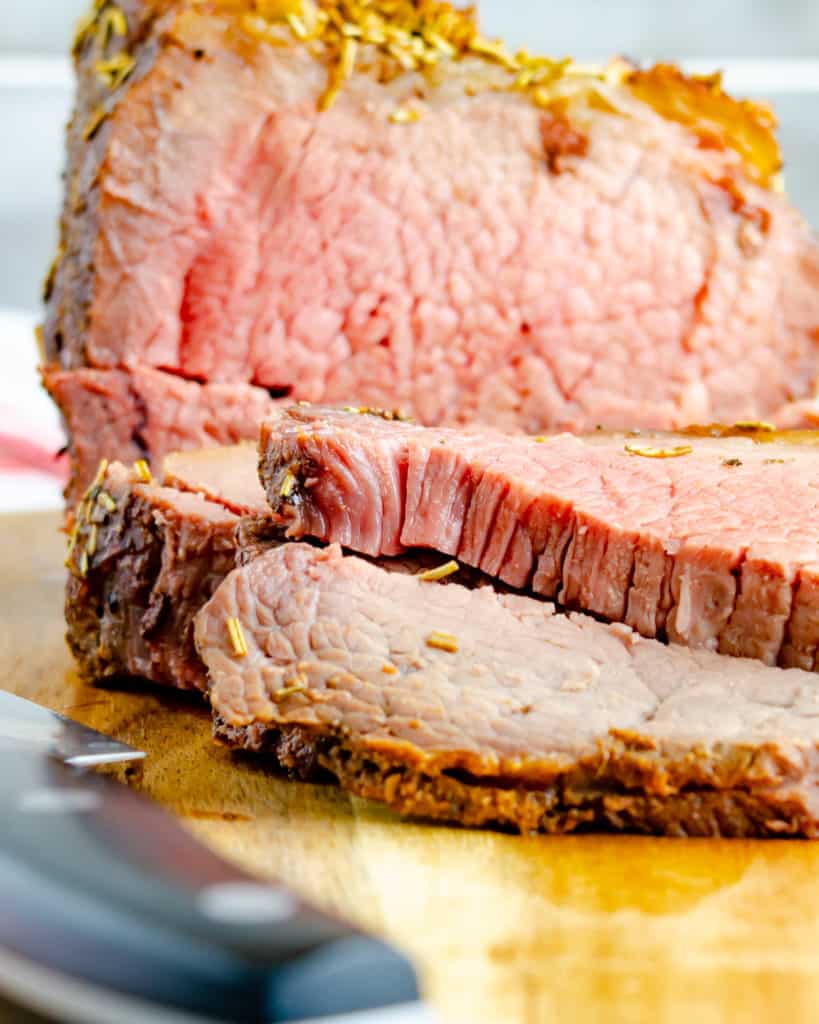
  • Carve, serve, and enjoy!

How Aus Jus

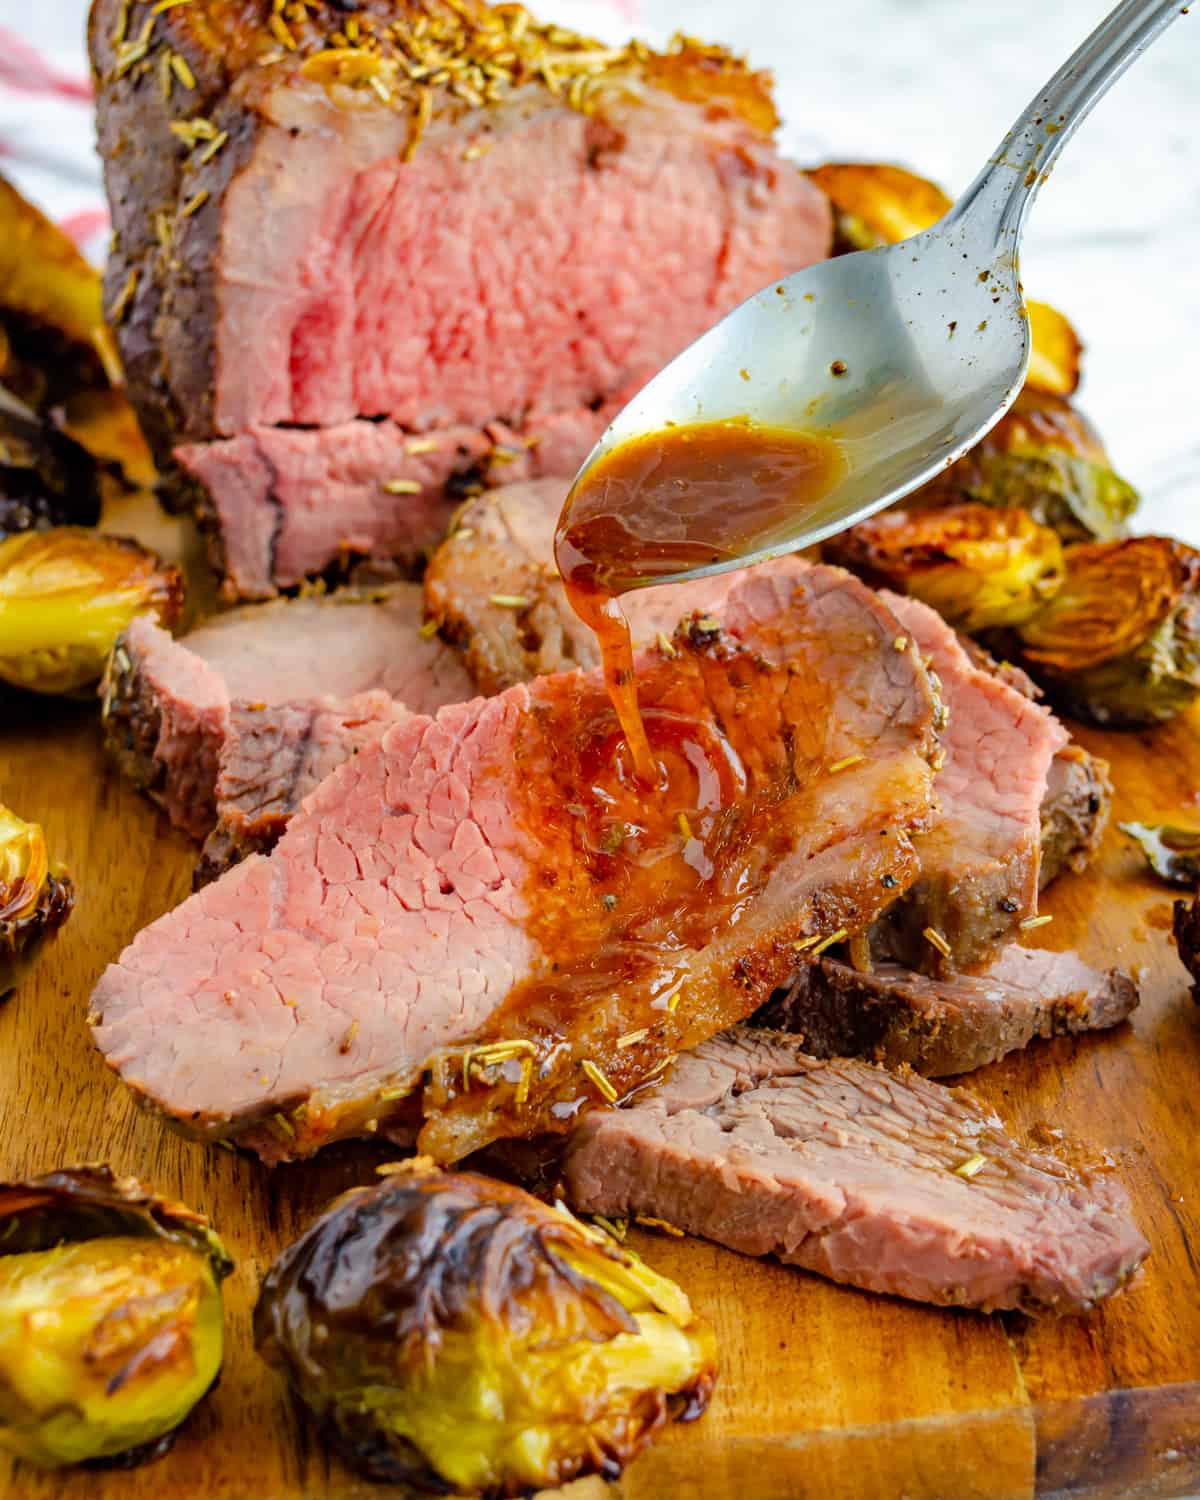
  • Deglaze roasting pan/skillet. Place the roasting pan or skillet with all the drippings over low heat and add the stock/water, vinegar, mustard, and wine. Use the back of a spoon to gently work the dripping from the bottom of the pan to deglaze.
    pan drippings, ½ cup broth/water, ¼ cup red wine, 1 tablespoon vinegar, 1 tablespoon Dijon mustard
  • Simmer and serve. Bring the au jus to a rapid simmer and remove from heat. Carefully season to taste and serve with fresh carved roast beef!
ad.

Notes

This proportions in this recipe are for coarse or flaked kosher salt. If you using fine salt use 1 1/2 to 2 tsp per pound of meat. 
Apply an even layer of brine over the entire roast. See image in the post above for more details. 
In general about 1 tablespoon per pound will be enough to brine a roast, however making extra allows you to make up for ay that falls to the cutting board while coating. 
Roast Size: Any size roast can be used for this preparation, you will simply need to adjust the cooking time and possibly the amount of dry brine used as needed.
Finished Temperature:  Be sure to pull the roast from t he oven when the internal temperature is 8-10° lower than your desired finished temperature (jump to post above for temperature guide
Brining Time: For very large roasts consider a 2 day dry brine instead of 1. 
Roast Type: Literally any type of roast can be used. For very large roasts or bone in roasts you will need to adjust the cooking time based on the weight. 
Check the internal temperature of bone in roasts more frequently to avoid over cooking. 

Nutrition

Serving: 6ozCalories: 490kcalCarbohydrates: 0.4gProtein: 45gFat: 31gSaturated Fat: 14gSodium: 750mgPotassium: 598mgCalcium: 40mgIron: 2.9mgSugar Alcohols: 0.04gNet Carbs: 0.4g

Nutritional information is calculated using the recipe calculator and verified database available from Cronometer. Although every reasonable effort is made to provide accurate information this estimate is provided as courteously and convenience only. To obtain the most accurate representation of the nutritional information in any given recipe, you should calculate the nutritional information with the actual ingredients used in your recipe.

Try the free recipe calculator at Cronometer
Did you give this a try?Mention @yummyforadam or use #yummyforadam on instagram!
Looking for a different low carb recipe?Something you don't see here or looking for a low carb version of your favourite recipe? Let me know so I can get working on it! Contact me directly or leave a comment!
Keywords: Dry Brine, Roast beef, semi-carnivore

Low Carb Side Dishes for Roast Beef

Here are some of my favourite low carb side dishes for roast beef:

4 Simple Tips for Perfect Roast Beef

  1. Allow the roast to dry brine uncovered in the fridge for at least 24h. Avoid letting other items in the fridge touch the roast while brining. 
  2. Drain and discard the liquid in the drip pan but DO NOT wash the brine off the roast
  3. Sear the roast in a hot oven before reducing the temperature to finish the cook. 
  4. Check the temperature well before think tis ready to avoid surprises. Remember to remove the roast from the oven to rest about 10°F before your desired finished temperature
  5. Always rest your roasts for at least 10-15 minutes depending on the size. 
Slices of roast beef on a cutting board with roasted Brussels sprouts

Enjoy!

1 thought on “Simple Dry Brined Roast Beef Recipe”

Leave a Reply

Your email address will not be published. Required fields are marked *

Recipe Rating